Managing an Organization
In this section, you will get to know how to search an organization, edit organization details, activate or deactivate an organization, and permanently delete an organization.
Searching for an organization
This step enables you to quickly locate specific organizations within the system using search terms. You can search by organization name or code to filter the complete list. The search is performed dynamically as you type.
To search for an organization, do the following:
-
Login to the platform.
-
Click the System Panel and then click the Organizations sub-module.
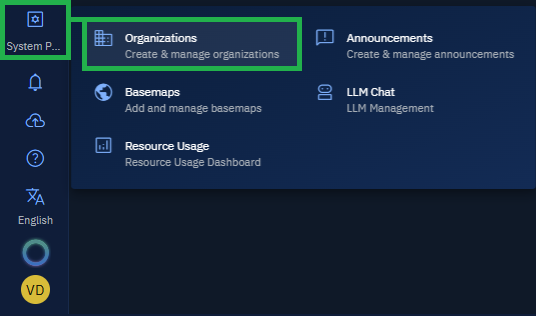
The Organizations page is displayed.
-
On the Organizations page, type the organization name or code that you want to find in the Search field.
The platform will automatically filter and display matching organizations as you type in the search bar.
Editing organization details
This function allows you to modify an existing organization's parameters and configurations. You can update all information except the organization code, which serves as a permanent identifier.
-
Login to the platform.
-
Click the System Panel and then click the Organizations sub-module.
The Organizations page is displayed.
-
On the Organizations page, locate the organization in the list that you want to edit.
-
Click the three-dot menu next to the organization name, and then select the Edit option.
-
Update the relevant information, and then click the Update Organization button to apply the changes.

Activating or deactivating an organization
This feature enables you to temporarily activate or deactivate access to an organization without deleting any data or configurations. When an organization is deactivated, users within that organization will NOT be able to log in. However the user accounts and data will remain intact in the system for a limited time.
To activate or deactivate an organization, do the following:
-
Login to the platform.
-
Click the System Panel and then click the Organizations sub-module.
The Organizations page is displayed.
-
In the Organizations page, locate the organization and do one of the following:
- Select Inactivate to temporarily disable the organization.
- Select Activate to re-enable a disabled organization.
Deleting an organization
This process permanently removes an organization from the system. Once an organization is deleted, it cannot be retrieved. Before deletion, ensure that you have backed up or transferred the data.
To delete an organization, do the following:
-
Login to the platform.
-
Click the System Panel and then click the Organizations sub-module.
The Organizations page is displayed.
-
In the Organizations page, locate the organization in the list.
-
Click the three-dot menu next to the organization name, and then select the Delete option.
-
Confirm the deletion when prompted.
Warning: Deleting an organization permanently removes all its users, roles, and associated permissions. This action cannot be undone.
Sorting the organization list
This functionality helps you to arrange the organization list based on different criteria to facilitate finding specific organizations. You can sort by any column in ascending or descending order.
To sort the organization list, do the following:
-
Login to the platform.
-
Click the System Panel and then click the Organizations sub-module.
The Organizations page is displayed.
-
In the Organizations page, click any one of the following column headers to sort the organization list in ascending and descending order:
- Org Code
- Org Name
- Storage Usage
- Status
- Date Created
Refreshing credits
This functionality enables you to refresh credits of an organization.
To know more about credits, see Understanding the credits system.
To recharge or top-up credits, do the following:
-
Login to the platform.
-
Click the System Panel and then click the Organizations sub-module.
The Organizations page is displayed.
-
In the Organizations page, locate the organization in the list, click the three-dot menu next to the organization name, and then select the Open option.
-
Click the Refresh button.
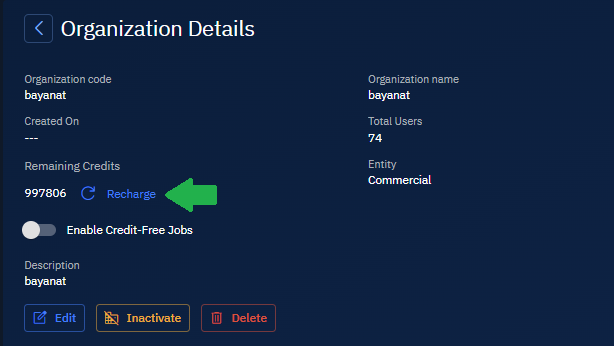
The Recharge Credits dialog box is displayed.
-
In the Recharge Credits dialog box, type the recharge amount in numerical, and then click the Recharge button.

The recharge amount is instantly credited to the organization's account.
Enabling Credit-Free Jobs
This functionality - as the name suggests - enables you to activate credit-free jobs for an organization.
To enable credit-free jobs, do the following:
-
Login to the platform.
-
Click the System Panel and then click the Organizations sub-module.
The Organizations page is displayed.
-
In the Organizations page, locate the organization in the list, click the three-dot menu next to the organization name, and then select the Open option.
-
Toggle the Enable Credit-Free Jobs button to turn on or turn off credit-free jobs for an organization.
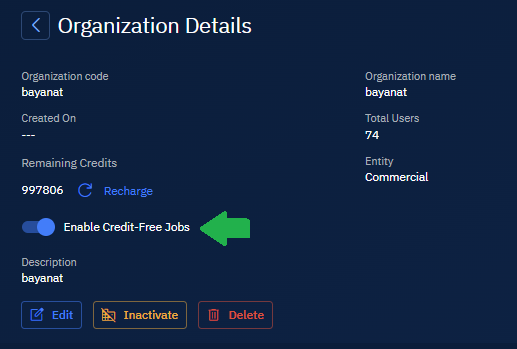
The jobs in the organization will now successfully run without credits.